CI/CD and DevOps for Snowflake: A Comprehensive Guide
In the world of data engineering and database management, seamlessly integrating Continuous Integration/Continuous Deployment (CI/CD) practices is crucial for agile, reliable, and efficient development workflows. Snowflake, a leading cloud-based data warehousing platform, is renowned for its scalability, adaptability, and exceptional performance. However, implementing CI/CD for Snowflake presents unique challenges due to the lack of standardised practices and dedicated tooling, compounded by a lack of comprehensive documentation outlining best practices for DevOps and CI/CD workflows tailored to database projects.
Despite these challenges, recent months have seen promising developments within Snowflake, with the introduction of new features hinting at potential shifts towards establishing clearer guidelines and tools for DevOps and CI/CD practices. As such, anticipation is growing within the community regarding the emergence of standardised approaches and enhanced documentation to streamline DevOps processes for Snowflake users.
This article will delve into an end-to-end demo of setting up CI/CD and DevOps for Snowflake, leveraging recent features and best practices.
Introduction: Bridging the Gap from SQL Server to Snowflake
As someone from a SQL Server background transitioning to Snowflake, the absence of a defined standard for managing database objects posed a significant hurdle. While SQL Server’s SSDT (SQL Server Data Tools) approach with DACPAC (Data-tier Application Component Package) files provided a declarative way of Database Change Management (DCM), Snowflake lacked such a standardised approach. Early approaches leaned heavily on tools like Terraform or imperative DCM solutions like Schemachange or Flyway, which might not align with everyone’s preferences.
Fortunately, Snowflake has been introducing building blocks for declarative DCM, including features like CREATE OR ALTER, EXECUTE IMMEDIATE FROM, Snowflake CLI, and Git integration. With these advancements, a more structured and efficient approach to CI/CD for Snowflake becomes feasible.
Leveraging Snowflake’s Building Blocks for CI/CD
Snowflake’s recent features provide a foundation for implementing CI/CD and DevOps practices effectively. These building blocks empower users to automate deployment processes, enhance collaboration, and ensure consistency across environments.

1. CREATE OR ALTER
Snowflake’s CREATE OR ALTER functionality allows developers to define desired states for database tables without worrying about their current state. This declarative approach streamlines the management of database objects and facilitates seamless deployment workflows.
2. EXECUTE IMMEDIATE FROM
The EXECUTE IMMEDIATE FROM command enables the execution of SQL statements stored in external files or URLs. This capability is important for automating deployment tasks and orchestrating deployment processes within Snowflake.
3. Snowflake CLI
Snowflake CLI empowers developers to execute SQL queries, ad-hoc queries, or files containing SQL queries with ease, using the snow sql command. This capability streamlines development workflows, allowing for efficient query execution and management within Snowflake environments.
4. Git Integration
Integrating Snowflake with Git repositories provides a centralised source of truth for code, enhancing collaboration and version control capabilities. Developers can track changes, manage branches, and leverage Git workflows seamlessly within Snowflake environments, fostering teamwork and facilitating efficient deployment pipelines.
Implementing CI/CD for Snowflake: A Step-by-Step Guide

Pre-Requisites:
- Snowflake account (with at least sysadmin access)
- GitHub account
- Git repository (with admin access)
Actual Demo Flow:
Follow these steps to set up CI/CD for Snowflake:
- Create Databases and Schemas
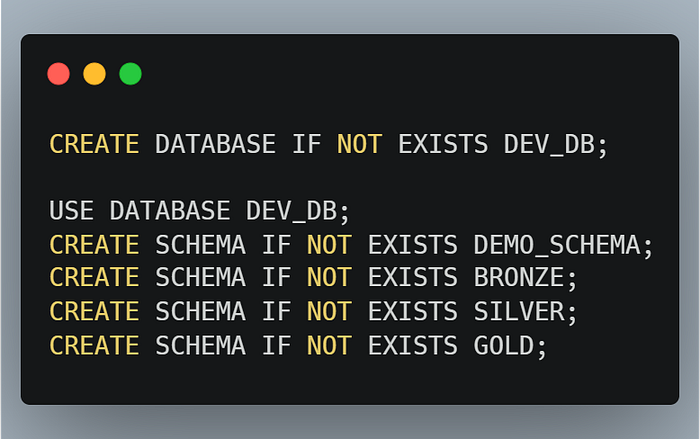
Do the same for other environments.
Note: Databases and schemas are fundamental objects that are ideally managed by Infrastructure as Code (IAC) tools like Terraform, especially as they rarely change. However, for this demo, we’ll create them manually.
2. Connect Snowflake to Git Repository
Step 2.1: Create a Personal Access Token (PAT) on GitHub
Navigate to Settings > Developer Settings > Personal Access Tokens > Tokens (classic) in your GitHub account to generate a PAT.
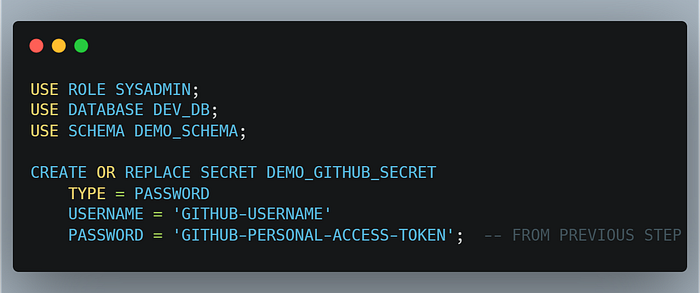
Step 2.2: Create a Secret to store the GitHub PAT.
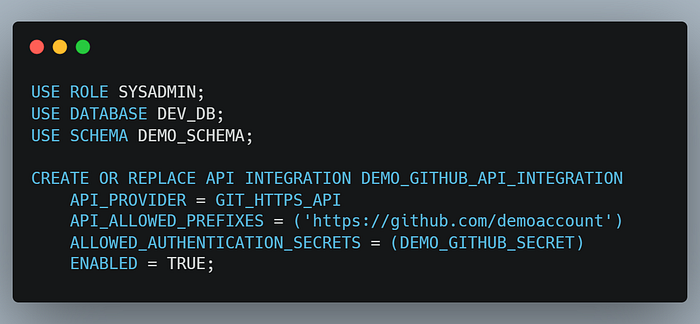
Step 2.3: Create a Git API Integration within Snowflake.
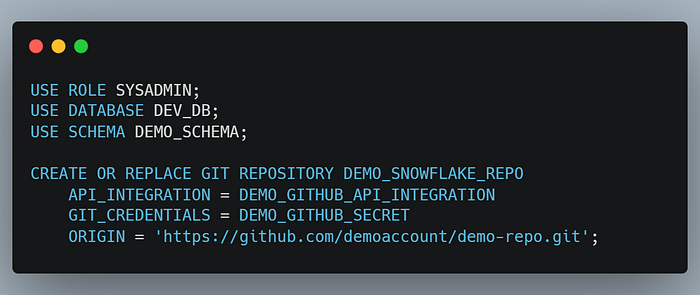
Step 2.4: Establish a Git Repository to store Snowflake objects and configurations.
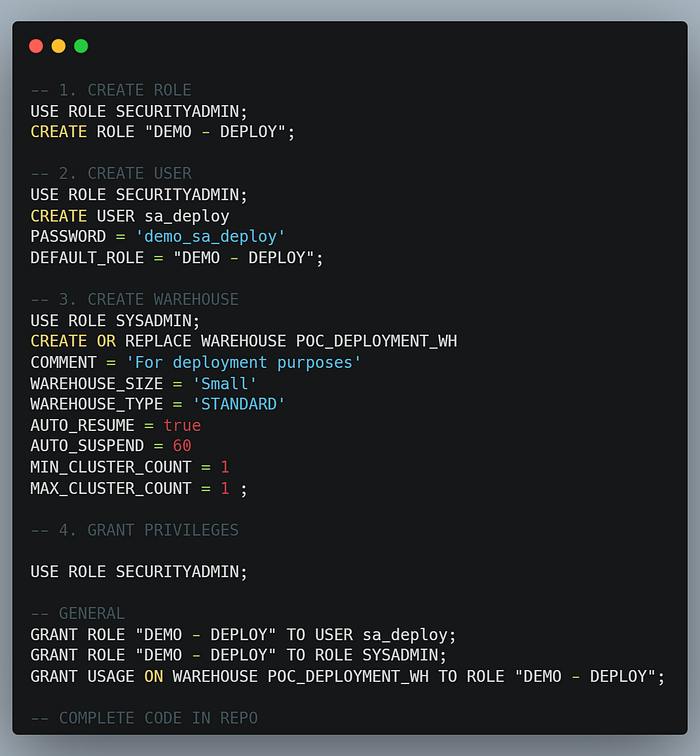
3. Create a Service Account and Other Snowflake Objects for Deployment
Set up a service account and any additional Snowflake objects required for deployment, ensuring appropriate permissions and access controls.
4. Local Development
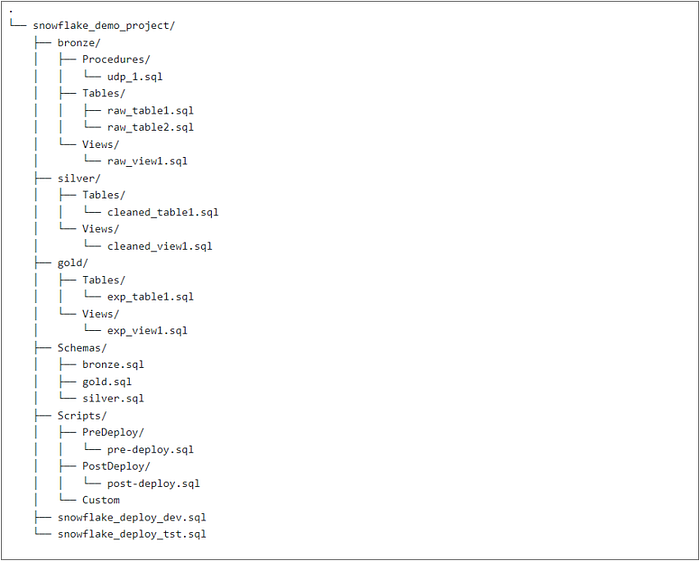
For our local development setup, I recommend structuring our Snowflake project’s folder hierarchy like the image below. Each schema would have its dedicated folder, and within each schema folder, we can further organise objects into subfolders based on their object types.
Additionally, I suggest including a Scripts folder at the root level to accommodate any pre-deploy and post-deploy actions, ensuring a well-organised and easily navigable structure similar to how DACPAC organises database projects.
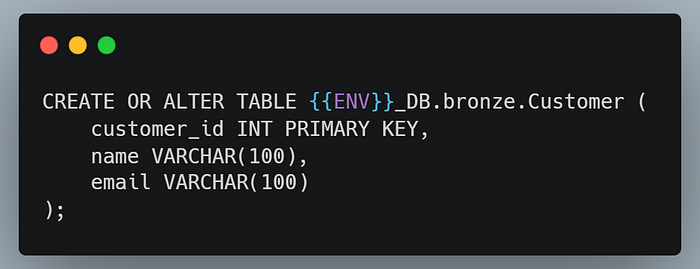
When creating tables, we can demonstrate the simplicity and efficiency of using Snowflake’s CREATE OR ALTER statement. This allows us to manage table schemas effortlessly, whether we’re creating new tables or modifying existing ones. For those tables already defined with CREATE OR REPLACE, transitioning to CREATE OR ALTER is a quick adjustment, ensuring seamless compatibility with our deployment pipeline.

Moreover, we can extend our deployment process by incorporating Jinja templating, offering flexibility and scalability. By parameterising database names, for instance, we can dynamically choose the target environment during deployment, streamlining the process across different deployment scenarios.
Highlighting the suggested folder hierarchy again, within our project folder, we’ll find two essential scripts: sf_deploy_dev.sql and sf_deploy_tst.sql. These scripts serve as our deployment entry points, orchestrating the deployment of Snowflake objects.
Here’s a sample snippet showcasing their structure:

5. Local Snow CLI Usage
In my experience, it’s beneficial to initially test the Snowflake CLI locally before diving into full-scale deployment pipelines. This allows us to verify the connection using the service account we’ve created, ensure correct access permissions, and facilitate easier debugging and testing.
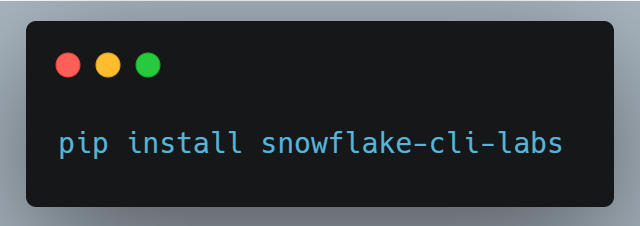
To begin, we’ll need to install the Snow CLI, a straightforward process that can be done by following the installation instructions provided in the Snowflake documentation.
Once installed, we’ll refer to the documentation for guidance on CLI usage and commands. In our context, we’ll primarily utilise two SQL commands for our deployment workflow.
Firstly, we’ll employ the ALTER GIT REPOSITORY command to fetch updates from the linked Git repository, ensuring our Snowflake environment remains synchronised with the latest changes in our codebase.

Subsequently, we’ll utilise the EXECUTE IMMEDIATE FROM command to execute SQL statements stored in external files or URLs. In our case, we’ll use this command to deploy our objects to a target database, referencing the path to our deployment script, such as sf_deploy_dev.sql.

In our Snowflake CLI commands, we’ll specify inputs like account, user, and warehouse to establish connections. Later, we’ll move these inputs to GitHub secrets for security and convenience.
6. Create GitHub Workflow
Configure GitHub Actions to automate deployment to target environments.

7. Populate GitHub Secrets
Populate necessary secrets and environment variables in GitHub to securely access Snowflake and Git repositories during the workflow execution.
Inside your repo, go to Settings > Secrets and Variables > Actions > New repository secret

8. Test Workflow
Validate the configured GitHub workflow by triggering it manually or through automated events (e.g., push/merge to main), ensuring successful execution and proper handling of deployment tasks.
Gotchas and Recommendations for Snowflake
Gotchas:
1. Limitations with CREATE OR ALTER TABLE
- This command’s limitation of only being able to add a column at the end of the table can be restrictive, especially if you need to insert a column in a specific position.
- The restriction to tables only means that you can’t use this command to alter other database objects like views or stored procedures.
2. Behaviour of CREATE OR ALTER in Snowsight
- The discrepancy between what the command does and how it appears in Snowsight could indeed be confusing. Even if a table was created via
CREATE OR ALTER, it still showsCREATE OR REPLACEby definition on Snowsight. Not sure if this is by design by Snowflake or a bug.
3. Single database connection in our YAML pipeline
- While it may seem practical to use the same database connection across all environments to maintain consistency, it’s important to consider whether Snowflake recommends or requires this approach. Despite deploying to higher environments like testing (TST) and production (PRD), we stick to a single connection to align with the environment where our Git repository is connected, typically development (dev). This choice ensures proper execution of SQL commands like EXECUTE IMMEDIATE. However, it’s unclear if Snowflake mandates setting up separate Git repository connections for each environment to enable the use of different database connections. Clarification of Snowflake’s recommendations is needed.
Recommendations:
1. Enhanced logging capabilities for better visibility during deployment processes.
- Currently, only the output of the last EXECUTE IMMEDIATE command is captured in the logs during deployment, which limits visibility into the entire deployment process.
- It would be beneficial to implement enhanced logging capabilities that provide a comprehensive view of all actions performed by Snowflake during deployment. This would allow for better tracking, troubleshooting, and auditing of deployment activities.
2. Development of Deployment Artifacts by Snowflake
- To simplify the deployment process to higher environments, it’s recommended to explore the development of deployment artifacts or deployment packages by Snowflake.
- Similar to the approach in SSDT, where a DACPAC is built as an artifact for deployment, Snowflake could provide a streamlined mechanism for creating and managing deployment artifacts.
- This approach would involve Snowflake generating deployment packages or artifacts containing the necessary SQL scripts, configurations, and metadata for deploying to different environments.
Implementing CI/CD and DevOps practices for Snowflake empowers organisations to embrace agility, collaboration, and automation in their data engineering workflows. By leveraging Snowflake’s recent features and best practices outlined in this guide, teams can streamline deployment processes, minimise errors, and accelerate time-to-market for data-driven initiatives.
As Snowflake continues to evolve, embracing CI/CD becomes essential for staying ahead in the rapidly changing landscape of modern data engineering.
